Exhaust: DIY 4" Upgrade
DIY 4" EXHAUST
Sova made an awesome 4" exhaust. This is a copy of his thread http://www.3si.org/forum/showthread.php?t=360839
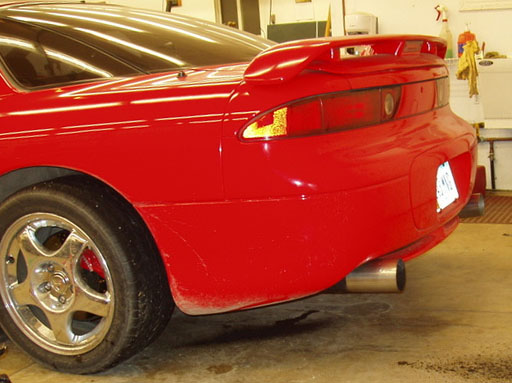
To sum it all up I made the exhaust all myself. I really like the exhaust tone produced. I like how quiet I can make it when I force it through the muffler. I like the design features I incorporated into the exhaust.
First off I will describe the design idea.
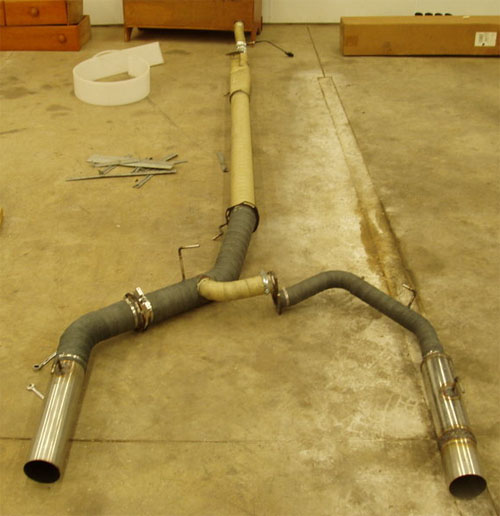
It all had to be stainless steal. I wanted the 4 inch section to be as straight as possible and yet make a straight exit in the back. I wanted to have a 2.5 inch side on the passenger side that has a muffler. I wanted a 4 inch exhaust cutoff plate that I insert in the 4 inch side to close it off and force the exhaust through the passenger side with the muffler. I wanted this cutoff to be activated by the active exhaust moter that is currently all but completely useless on my car as this is a very integrated and user friendly way of opening a cutoff plate. Then to top it all off I wanted v-band flanges on the downpipe section to make for easy removal.
Now for how I did it and what I used.
I purchased the materials from a couple of different places all of which I would recommend anybody to.
http://store.racing-solutions.org/
I purchased a 2.5" builder kit and a 2.5" flex section. I used these bends to make the downpipe and the 2.5" passenger side exit with the muffler. I put the flex section between the front and rear turbo downtubes to make alignment easier and to protect against stresses caused by thermoexpansion and motor movement.
http://www.stores.channeladvisor.com/verociousmotorsports
I purchased most of the materials from this site.
- 2.5" straight tubing
- 2.5" 3 bolt flanges
- 2.5" 2 bolt flange
- 2.5" v'band flanges
- 3/8" bar
- 4" straight tubing
- 4" mandrel bends
- 4" v-band flange
- o2 bung
- Rubber exhaust hangers
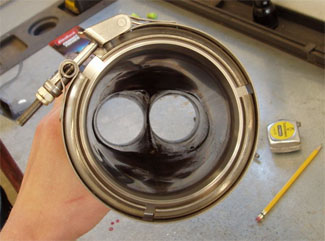
I used the 2.5" 3 bolt flange between the two exaust exits. The 2.5" v-band went on the front downtube for the downpipe and I was not able to place the rear in a place I liked so I just left it as a 2 bolt flange instead. I only used one 4" 90 degree bend in the whole exhaust and basically only two 45 degree bends in the whole 4" section which made me happy. There really is a lot of room to work with on the driver side after the differential.
www.summitracing.com
- 2.5" straight through magnaflow muffler
- exhaust insulating wrap
www.weldingsupply.com
- 309L welding filler rod
- 308L welding filler rod
I mostly used 308 filler rod as this is made specifically for welding stainless like 304 to 304.
www.badlanzhpe.com
- 4" cutout plate
- I did all the welding and fabrication in a shed that my father, brother and I built a few years back that is extremely nice for working in. Lots of light, space, and heat to make this project easy to accomplish.
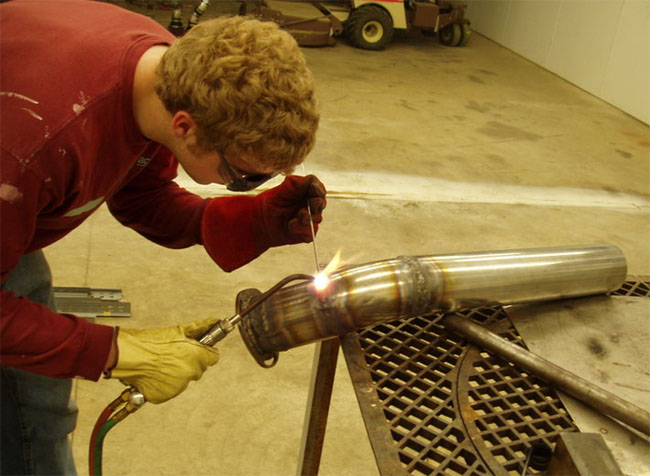
- I did all the welding using an oxy-acetylene welding tip and using a carborized flame. Much to my surprise it was easier than I had anticipated as this was the first time I had ever welded stainless.
- I did most of the cutting of the tubing with a band saw that was handed down to my father from his grandfather which means that that thing is antique. I did a lot of gringing using air tools and carbide cutters.
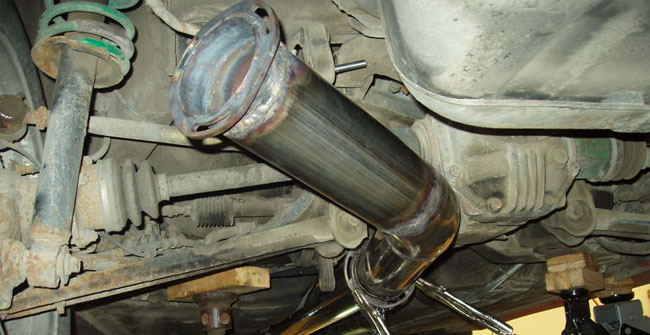
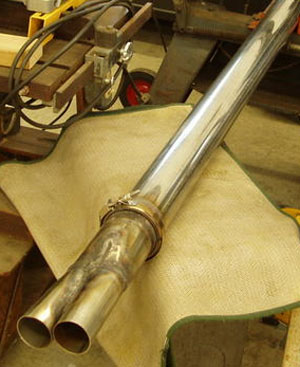
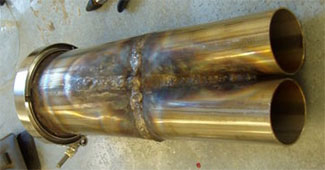
I started by making the collector for the downpipe for no perticular reason and may not have been the best place to start. I made this by cutting a V out of two 2.5" sections of tubing. I then welded these together expanded the opening slightly. I then pounded a 4" tube into a oval shape and welded the two together and used air tools to smooth the inside. The next design area was in the placement of a 3 bolt flange pair at the exit where the active exhaust cable is. I haven't yet gotten the active exhaust to work with the plate I purchased but I didn't have enought time during break to finish it.
After I finished the 4" section I finished the downpipe. This particular downpipe is unique to my vehicle and will not bolt up to any other car in existance since I have made or modified most every part of my turbo system. I used a v-band in the front and a 2 bolt in the back and a flex section between them. I then welded an o2 bung to it for my wideband.
I then confirmed that what I had worked by installing the exhaust with downpipe and single shot 4" and driving for a day with success. I then constructed the passenger side exit with the muffler and 2.5" tubing. I y'ed off of the 4" with a piece of mandrel bend that appears to come straight out of the 4" but infact very smoothly flows out of it. I placed this after the turn in the 4" so as to limit the amount of exhaust forced through this tube while the plate was closed.
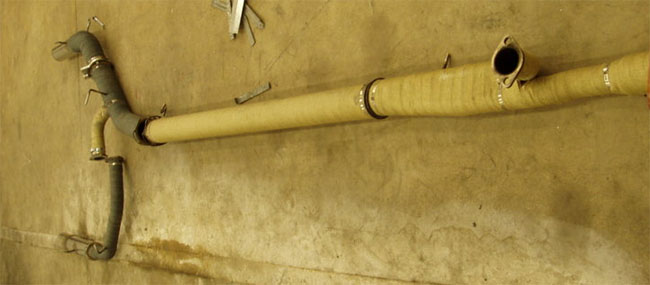
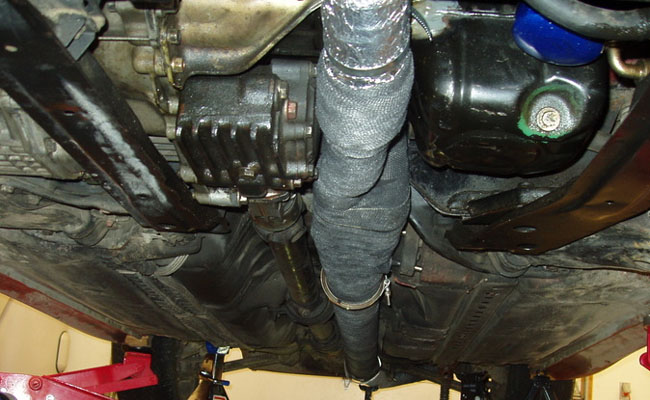
After I completed all the welding I wrapped it all with fiberglass exhaust insulation. I then painted everything with a high temp spray paint.
I am extremely happy with how everything turned out. I still need to complete a few features that will give it a special touch. I am going to angle cut the tips and possibly polish them up. I also need to finish the cutout plate integration with the active exhaust motor.
I didn't save the receipt for the cutout plate but it was $75 from http://www.badlanzhpe.com You can also just buy the whole electric cutout from them too. I just bought the plate and I am going to modify it to work with the active exhaust. I also bought the flanges that you see on my 4" sections from them but I would not recommend this to you because they were not made for a 4" pipe and required a lot of filler and grinding to get them flat again. I would search for a better source for the 4" exhaust flanges.
In all I spent about $1300 and when you subtract the things that I used on other projects and items that I didn't use it would have come out to be about $1050. I could have saved a lot of money if I had decided not to use v-band flanges but I wasn't trying to make a 4" exhaust as cheap as possible. If I wanted to do that I would never have made a dual exit, wrapped the whole exhaust, used v-bands, used a cutout, and possibly used a material cheaper than stainless.
I wrapped the exhaust for a couple of reasons. First off I didn't want any spot where I got to close to something to cause a problem with it getting too hot. Second I wanted to keep as much heat in my exhaust as possible to retain exhaust velocity and as a result more performance. The last reason I did this is I really don't like seeing shiny exhaust parts under the car. I like everything to be black and dull. It is just a personal preference.
The welding you see is the first stainless welding I have ever done period. I got a lot better as the project went on. I have done some mild steel welding in the past with my oxy-fuel torch but not enough to claim to be very good at it. Like I said I had no clue if welding stainless with oxy-fuel was even going to work and much to my surprise it worked quite well. One thing I noticed was that with a carborized flame and the stainless the puddle as I welded ended up being very wide in order for me to get the penetration I wanted. Another thing was that with this kind of welding you have to be very careful of warping things like flanges because the surrounding metal gets a lot hotter than an electric torch would have.
The welds have all held perfectly and I have not seen any leaks at all. I would not be surprised if there wasn't a few pin holes but I do not think there is very many. Everything sealed up better than I had hoped. All the filler rods where 308L.
I decided to put the second exit on because I like to cruise and drive around 70% of the time in a very quiet manner and then the other 30% of the time I want to be loud and with my arrangement I will be able to achieve this. Once again this is more of a personal preference. I weighed the options and I felt that it was more important to me to have the quiet ability than to have the small increase in performance.
I didn't run 4" on the other side because I didn't design the exhaust to want to got through this side unless the cutoff plate is closed. I put it after the bend on the top of the pipe so that the momentum of the exhaust gasses actually carries most of the exhaust past the 2.5" pipe and out the 4" side. I also wanted the 2.5" because this reduction in pipe diameter I hoped would quiet the exhaust even more and the 2.5" is a hell of a lot easier to fit on the passenger side than a 4" would have been.

